It is surreal to see your designs take form in three dimensions!
The flat (vector) Goldielocks has gone into the woods to visit some friends... and acquired some serious curves along the way :).
Check out these nesting dolls here.
Showing posts with label fun project. Show all posts
Showing posts with label fun project. Show all posts
Thursday, May 1, 2014
Wednesday, April 16, 2014
back from the Makerie . . .
I'm back. Back at a regular altitude. Back from the wondrous Makerie retreat in Colorado. I had an amazing time with the most creative and giving people I've ever met and I'll do it again in a heart beat:). I've made some new friends and met some old ones (Marisa Anna - Creative Thursday). I already miss the tangible joy of making that was permeating the air at the Makerie.
Monday, March 25, 2013
Monday, June 6, 2011
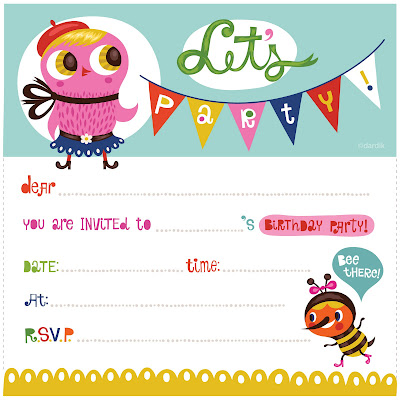
my printable birthday invitation...


 Anais is having a birthday in a few weeks. As I was working on an invitation for her little party I thought - 'it's been a while since I've had a 'blog reader appreciation day'...
 So here it is! I really appreciate you guys blog-visiting me and my work and I thank you with these FREE for you birthday invitations that you can use for your little one's birthday parties:) Hope they come in handy!
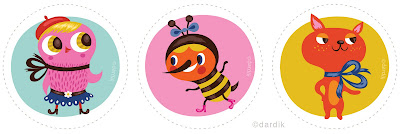
Oh, and the illustrations in the circles could work well as cupcake toppers if you cut them out and tape them to toothpicks.
Just promise me you wouldn't use them commercially... OK:)
To copy:
1. Click on the image.
2. It will open in it's own window.
3. Hold Control key while clicking on the image.
4. Find it on your desktop.
5. Open in photoshop.
6. Image size... whatever square size is good for you:) (true size 6in at 300dpi) Feel free to make them smaller or larger...
2. It will open in it's own window.
3. Hold Control key while clicking on the image.
4. Find it on your desktop.
5. Open in photoshop.
6. Image size... whatever square size is good for you:) (true size 6in at 300dpi) Feel free to make them smaller or larger...
These would go great with colorful square envelops.
Sunday, February 20, 2011
a whole new wall . . .


 The plate wall is up and I love it! It has elevated the dining area from 'all right' to 'awesome!''. I wanted to take a picture from straight on... but the lamp was in the way. I might need to change to something far closer to the ceiling.
Thanks again to Lisa Congdon for inspiration and Heather Moore for helping me start my collection:)
Oh... and to Michael - for putting up with my precise directions:)
Tuesday, August 31, 2010
printable fun...


September is on the doorstep. My girls are starting school in a week. The school supplies are purchased and awaiting to be used. All is ready for another year of yellow buses, backpacks, holes in the jeans and homework. So... before I left on my little vacation I wanted to share these printables with you.
These would look good on folders, books and duo-tangs. Feel free to use these for your little students:)
To copy: click on the image - it will open up in its own window at a high resolution (300dpi-true size). Copy that to your desktop and feel free to use:) You could make them smaller if you'd like.
Monday, June 14, 2010
my sweet treats color me puzzle...


 Sharing my sweet treats color me puzzle (here) with you today. I love the way it turned out!
It comes in 24 pieces (two sided) and with 5 jumbo wipe-off crayons to color the black and white side:)
It's been two weeks since I've tasted chocolate or any other sugary goodness (so...looking at this puzzle is bittersweet:).
Monday, June 1, 2009
fun in pictures...


 The weekend , as always, was too short. Blink... gone... I've managed to squeeze in trip to my favorite sushi restaurant with my parents (I penciled them in... ha ha:) ... a major clean up of my 'mansion' ... and some fun picture taking that I'd like to start this monday with:) A show and tell of a sort.
Monday, April 27, 2009


 The weekend just flew by me:) When the weather gets warmer, time just evaporates:) It was 26° on Friday. I opened all the windows and cleaned my office and the rest of "our winter cave" (with some serious help, of-course). It's such a good feeling to know where everything is in the office! It truly defines a peace of mind.
A good portion of the weekend was spent sitting outside with a cup of coffee, pretending that time is an illusion and I have nothing better to do with it:) Ahhhh.... good times:)
Also, took a lot of pictures... and a few turned out good (above).
Monday, March 16, 2009
Click...


 They say that 'happiness is being satisfied with what you already have'... and so I have found a perfect cure for the ' I wannnaaa' syndrome that makes us all buy new things that would possibly meet the same fate as the things we already have - 'forgotten'. The cure is temporary... but it works:) Here it is:
Try taking pictures of the things you already have. That helps looking at them in a different way and reminds you why you got it in a first place. Sort of - fall back in love and realize how great what you already have is!
That's what I did this weekend:)
Friday, February 13, 2009
xo
Thursday, December 11, 2008
how stars are made:)


 When one can't find their ideal christmas tree star ornament - one must come up with a solution! And, than, share the solution... of course.
First, I have to tell you, I did look. High and low. It's always the same gold or silver, sometimes crystal (plastic) star that just doesn't speak to me. So... I made my own, and I like it!
If you like it too - here's how to make one for your christmas tree:
You will need: vinyl/pleader in 2 colors, thread in 2 colors, scissors, needle, sewing pins, synthetic stuffing and the pattern provided above.
1. Copy the pattern onto your desktop. Print it out. Cut it out.
2. a) Trace the star you've cut out with a color pencil onto the back of the red vinyl (red pleader, fake leather). Twise - for the front and the back.
b) Trace the mouth and eyes onto the the white vinyl/pleader.
c.) Carefully cut it out.
4. Place the eyes and mouth where you need them onto one of the red vinyl stars. Pin them on with sewing pins. Using the running stitch attach with white thread.
5. Put the two red vinyl star cutouts back to back so they match. Secure them together with pins.
6. Using the running stitch and (leaving 3mm away from the edge) attach the 2 sides together. As pattern indicates, leave the space at the bottom open.
7. Push a bit of synthetic stuffing (old pillow, perhaps?) to fill out the star.
8. Trim and clean the top of your tree (3-4 inches) and put your star on.
9. Proceed with the rest of the decorations:)
I hope this makes sense.
HAVE A WONDERFUL WEEKEND!
Tuesday, September 30, 2008
drawing on fabric...

 Experimenting is fun! My first fabric drawing ever! I just bought some pebeo fabric paints and went to town. I know nothing about this, so I'm winging it:) It felt a bit like gouache, and the fabric was so thin that it would occasionally soak through, but not too much. I'll be using thicker fabric next time. I wonder what is the best fabric, the best paint and the best technic. If anyone has any advise on the subject, please share:) I'm all ears.
Friday, August 15, 2008
it's apples and oranges...
Tuesday, August 12, 2008
prefab modern for birds:)

 I know it's kind of late in the season to be thinking about bird houses... but check out this affordable little eco shack:)
I got two, and the girls had so much fun putting them together and painting them! Now we just need to find the best location for these cardboard (water repellent) sheltaroonies:)
(from POP DELUXE, $3.99)
lil tiny tile dilemma...

 I found this little 70th Japanese bird tile on Etsy (fox & found), and had to have it! It just makes me happy to look at it!
 Now that it has arrived (just as pretty as I've hoped), I want to display it, but I can't think of a way to frame it. If you have any advise for me ... do share:) I would really appreciate it.
Subscribe to:
Posts (Atom)


